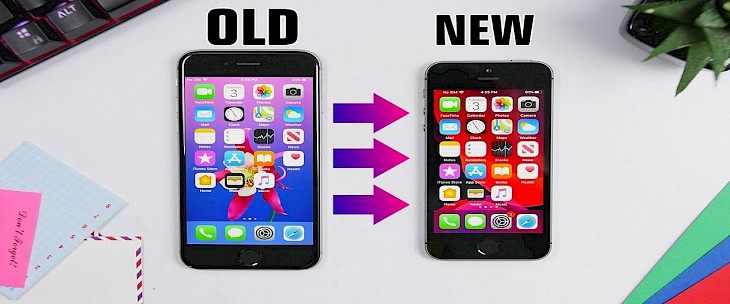
I think many people are wondering how to transfer everything from one iPhone to another iPhone without iCloud? If you are looking for the right answer, I assure you that you’ll not be disappointed. It is not quite as tough as you think; instead, it is easy, and with this guide, you can easily transfer stuff from your device without much hassle. Let's go through this together.
Pros and Cons of iCloud
Because of its simplicity, ease, accessibility, and security, iCloud may be the best choice for moving data from one iPhone to another. However, aside from these wonderful advantages, iCloud has several limitations, including restricted storage capacity, significant internet reliance, limited options for moving specific files, and so on. All of these factors may preclude you from utilizing iCloud.
The cloud securely saves your material and keeps your apps up to date across all of your devices. That means you can access all of your information – photographs, files, notes, and more — from anywhere. You get 5 GB of free storage with iCloud, and you may add extra storage at any time.
Changes made on one device are reflected on all of your other devices when you use iCloud. On iCloud.com, you can now access web versions of your favourite applications, including Photos, Mail, and Notes. Simply sign in using any web browser that is supported.
I am not sure about your reason for ditching iCloud, but there are several alternatives,which are viable options available for transferring everything from one iPhone to another. The four methods listed below can be used to transfer data from an iPhone to an iPhone without using iCloud.
They are all arranged in descending order of complexity. Choose the one that best meets your requirements.
Method 1: Using EaseUs MobiMover
If your iOS devices are operating on iOS 8 or later, you may use the iOS data transfer app - EaseUS MobiMover to move compatible documents from one iPhone to another without using iCloud or iTunes.
You may use this program to transfer several or all files to your new device without synchronizing them. Aside from that, this application may assist you with tasks such as:
You can manage your iOS data as per your wish.
Without difficulty, backup all or particular iOS data to your PC.
Messages from WhatsApp may be transferred across iPhones.
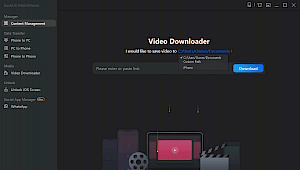
Download desired videos from any website.
Connect both iPhones to your computer and run EaseUS MobiMover. Then, select "Phone to Phone," confirm the transmission direction, and select "Next."
Choose 1 or more subcategories as you wish to copy and then hit "Transfer."
Hang tight for the program to transmit the files you've chosen from one iPhone to another. When the procedure is complete, navigate to the appropriate applications to inspect the newly uploaded files.
Method 2: Quick Start
Quick Start is among the easiest ways to approach and move files from one iPhone to another without the use of iCloud. In addition, QuickStart will allow customers to access their data utilizing the iPhone Migration option when both the source and destination iPhones are running iOS 12.4 or later.
It is an iOS 11 and later utility that can assist in the transfer of information and data to a new device. Assuming that both your prior iPhone and the new iPhone are operating on iOS 12.4 or later, proceed with the instructions below to set up your new iPhone and wirelessly transfer all your data to your new device:
Turn on your prior iPhone's Bluetooth and then turn on your new iPhone.
Place the new iPhone near your old iPhone, and the Quick Start screen will appear on your source iPhone, with the opportunity to set up your new iPhone using your Apple ID.
Check that it is the Apple ID you wish to use, then click "Continue."
Following that, an animation may be seen on the new iPhone. Hold the old iPhone over the new one, center the animation in the viewfinder, and a message "Finish on New iPhone" will appear.
On the new iPhone, enter the passcode from the prior iPhone.
Set up FaceID or Touch ID on the new device by following the on-screen prompts.
Now, press the "Transfer from iPhone" button to begin transferring all data from one iPhone to another.
When the procedure is finished, you will smoothly move everything from your old iPhone to the new device.
Method 3: Transfer Data Via Airdrop
Another simple alternative is AirDrop, which enables you to exchange data between two iOS devices that support AirDrop. So if you need to send photographs, contacts, or other things from one iOS device to another, AirDrop is a fantastic option:
Check whether the two iPhones are within the Bluetooth and Wi-Fi range of one another.
Activate Bluetooth and Wi-Fi and turn off Personal Hotspot on iPhones. After that, activate AirDrop. (Choose whether to transmit files to "Contacts Only" or "Everyone").
Choose the documents you wish to transmit, such as photographs, and then hit the "Share" button.
Choose the target device by clicking "AirDrop."
To get the goods, tap "Accept" on the target iPhone.
Method 4: Using iTunes Backup to Transfer Everything From the iPhone to the iPhone
An iTunes backup nearly contains all of the data and settings on the iOS device. However, there are certain limitations, such as material from iTunes and App Stores, information synced from iTunes, data already saved in iCloud, and so on.
Creating an iTunes restore is very similar to creating an iCloud backup: To transmit data from an iPhone to an iPhone using iTunes, you must first back up the old device and then recover the new phone data from the iTunes backup while configuring the new device:
To make a backup of the old device, follow these steps:
Connect your prior gadget via USB to the desktop computer.
In iTunes, go to the "Device" tab and then to "Summary."
To begin backing up your old iPhone, click "Back Up Now."
To restore your new device from a backup, follow these steps:
Switch on your new smartphone and proceed through the setup process until you reach the Apps & Data page.
Select "Backup from Mac or PC" and link your new iPhone to the computer where you backed up your old iPhone.
Click the "Device" tab in iTunes and then select "Restore Backup."
Select the appropriate backup and wait for the process to complete.
Complete the remaining setup procedures.
Winding-up
These are methods that are often used by many people. So, you can choose any method from the methods that are mentioned above. The methods are in ascending order of their difficulty. I hope you can successfully transfer files from one iPhone to another iPhone using the above methods.


