So, you want a break from your regular old MacOs?
Why not try Alpine Linux.
Well known for its simplicity, security and sleep. Alpine Linux is one of the best Operating Sytems for Cloud Computing and Oper-Source Development.
So, if you are interested in diving a little deeper into your curiosity trove of Computers then Apline could be the best OS for you.
Here’s how you can install Alpine Linux on your MacBook
Setting up VirtualBox
VirtualBox is a globally recognized hypervisor host that can be used to set up multiple Operating Systems in one device.

At the preface, VirtualBox is very handy, uses almost no cookies, and does not overly affect the performance of your MacBook. Thus, making it a better option than traditional Dual-Booting.
To download VirtualBox:
- Open Safari Browser on your MacBook and go to Google.
- On the search bar type Oracle VirtualBox.
- A list of searches will come up, click on the very first link and wait for the official VirtualBox webpage to load.
- Once you are on the webpage you will be greeted by a large blue dialogue box showcasing the latest version of VirtualBox which is ready to download.
- Click on the Dialogue Box.
- A list of packages for VirtualBox will appear.
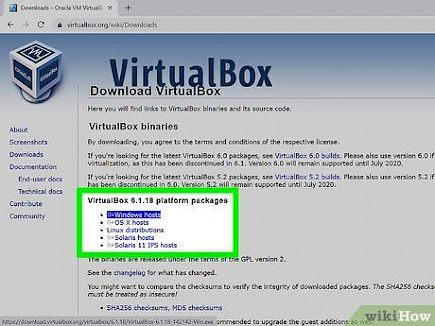
- Select OS X hosts and wait for the download.
- The whole (.exe) file will not take more than 120 MB of data to download.
- Once you have installed the VirtualBox now you have to set it up.
To Install the VirtualBox:
- Just after the download is completed a new window will open showcasing all setup processes for VirtualBox.
- Select “VirtualBox.pkg” option.
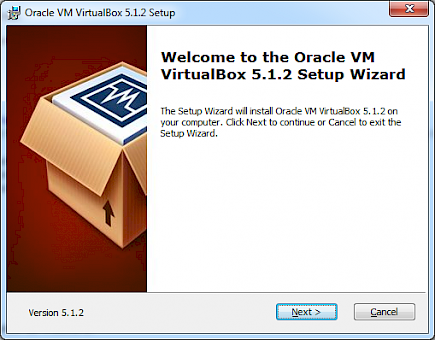
- Give the installation wizard all permissions to make necessary changes.
- Then click Install.
- A new window will appear where you have to set up a username and password for your VirtualBox host.
- Once it is done you are golden to go.
- The whole installation process will not take more than a few minutes.
Setting up Alpine Linux
To set up Alpine you have to download its batch file from AlpineLinux.org
- Open Safari Browser and in the search bar type “Alpinelinux.Org”.
- Once the website is open locate the download button and click on it.
- A new webpage will appear, scroll down and you will find the recommended list of Operating Systems.
- Choose the operating system of your choice and click download.
Once you have downloaded the important batch files for Alpine now you have to set it up using VirtualBox.
For Installing Alpine:
- Go to the macOS menu and look for the VirtualBox icon and double click to open it.
- Once the VirtualBox window is open go to “New”.
- Now fill up all the important credentials and click continue.
- A new window will appear showcasing the needed memory for the installation to commence.
- You can set the space by adjusting the size bar, At least 2 Gb of memory is recommended to install Alpine.
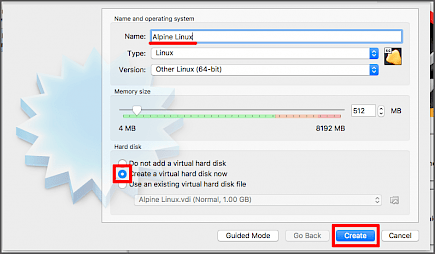
- Once you have set the memory limitations click continue.
- Now a new window will open showing what type of file you want to create on the hard disk.
- Click on “Create a Virtual Disk now” and set up “VDI” as the file type.
- In this step, you also have to dynamically allocate space for the installation and file.

- Once the space is allocated click create.
- A new Virtual Disk has been created to install and run Alpine Linux on your MacBook.
- Now a new window is open, click on the “Settings” option located on the top.
- In settings go to Advanced.
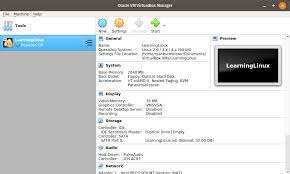
- Now go to storage.
- A controlled IDE option will be given on the left side pane.
- Locate the “Empty” option below it and click on it.
- Now select the freshly downloaded batch files in the “Optical Drive” column and go back to the original VirtualBox window.
- Now click on Start.
A new bios mode will appear from you choose installation options as per your will. Once you have chosen your option the installation will start.
And just like that, you have Installed Alpine Linux on your MacBook.
Note: A few more options like time, region, and language setting might be needed during the setup of Alpine. So, do the needful. Plus, Alpine Linux being a secure host system will ask for a username and password so be sure to provide a strong password and username
Once the BIOS setup is in motion the system will ask you whether you want to partition your disk or not. Click partition and set the native OS(macOS) as main OS and Alpine as secondary.
The whole process of disk partition can take from a few minutes to a few hours. Be patient or any wrong click or inputs will cancel the installation.
To run Alpine on your MacBook

- Open the VirtualBox.
- You will see the recently installed Alpine Linux option on the left side of the window.
- Click on the option.
- A drop-down menu will ask for confirmation of your action, click on “Switch” and confirm.
- Wait for the Alpine Linux to boot up.


