How to set up Mac Studio?
The Mac Studio is a unique opportunity in Apple's range for creative professionals who want to charge the computer to their firm or for those who want the quickest Mac available regardless of price.
Suppose you are one among the individuals who are into the creative field and have bought the mac studio.
In that case, it is imperative for you to know the process of setting up the mac studio.
In this guide, you can seamlessly set your device without much hassle,
What is Mac Studio?
The Mac Studio is a mid-range Mac that lies between the Mac mini and the Mac Pro. All these are two very distinct devices with completely different target markets and form factors.
The Mac Studio, on the other hand, manages to bridge the gap between both, providing considerable capability in a very tiny desktop form size.

That's the first Mac with an Apple Silicon CPU that's capable of real desktop-class performance. Up to this point, the Apple Silicon treatment had been limited to the Mac mini and iMac, with just the entry-level M1 processor available. Due to constraints in RAM, memory bandwidth, available GPU cores, and other factors, professional processes were hampered.
The Mac Studio has a revolutionary twin blower dynamic cooling system that Apple claims are "whisper quiet," albeit under high workloads, giving it the appearance of a taller Mac mini.

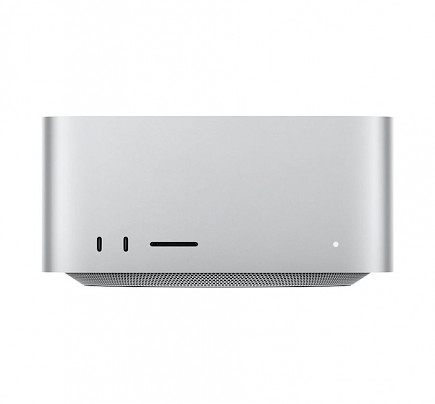
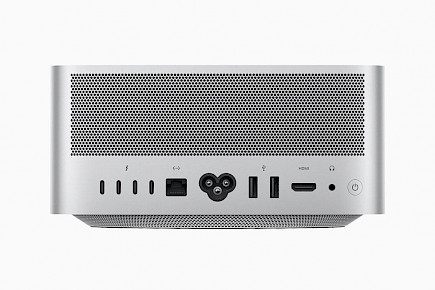
On the front, there seem to be two USB-C Thunderbolt 4 connectors and four on the rear, as well as two USB-A ports and an HDMI out. Up to five monitors may be connected to the Mac Studio, four through Thunderbolt and one via HDMI.

How to set up Mac Studio?

You don't have to worry much about the Mac Studio. Once you have bought the mac studio, you can take a few minutes to enjoy this.
But if you are thinking that this happiness will get ruined once you start the setup process, then it’s not correct. You have the Setup Assistant, which walks you through all the setting up processes.
You will have to choose the options as you go through the process. But let’s take you through the steps of setting it up.
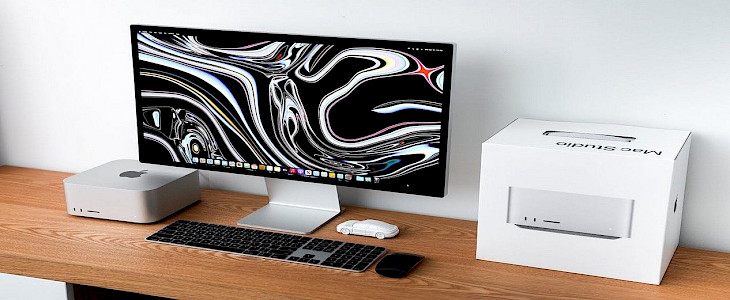
- Firstly you would just unpack your mac computer, keyboard, magic mouse, and studio display(depending upon whether you have bought these accessories)and will put them in their defined position. Don't forget to start it(or else you will think it is just not working).
- The next step for you is to set up your country or the region you are currently in. Alongside, set the time zone according to your region.
- The next step is to choose accessibility. For your Mac, there are four key accessibility emphasis areas. We can use your voice to operate your Mac etc.
- Select the network and, if necessary, provide a password. If you want to change the network later, go to the menu bar and tap the Wi-Fi status indicator, then Other Networks, then select a Wi-Fi network and input the password. You may also toggle Wi-Fi on or off from here.
- If you're installing a new computer for the first time and haven't done so before, select "Not Now." See Import your data to your new Mac Studio if you wish to transmit information from another device now or later.
- Now it's time for you to put your apple id here. You know how important it is, right? So never get lazy in saving your apple password safely.
- Don’t forget to store your files in iCloud; you can save your important things like documents, images, and more in the cloud using iCloud and retrieve them from anywhere. Make sure you use the same Apple ID across all of your devices.
- You have to decide on the touch id; whenever you set up your Mac Studio, you may add a Fingerprint Sensor if your keyboard allows it.
These are the important things that you have to set up without skipping. But there are a few things that you can set up later like:-
Apple Pay:- During the setup of your Mac Studio, you may set up Apple Pay for one user account. Other users may still use Apple Pay to make purchases, but they must do it using an Apple Pay-enabled iPhone or Apple Watch.

Hey Siri:- During setup, you may enable Siri and "Hey Siri" for your Mac Studio with Studio Display. When prompted, say several Siri commands to enable "Hey Siri."

Wrapping Up
And just by following these simple steps you can set up Mac Studio and enjoy the ultimate processing power of M1 ultra at your fingertips.
Hope you liked the article. We will be back soon with other fun hacks and tutorials, until then. Stay Tuned, Good Day!


