
If you are a newbie to an iPhone or iPad, you may have a few questions like "How do I change my fingerprint or Face ID?".
Well, worry no more cus we are here to let you walk over those hurdles easily.
Today we will discuss with you the steps via which you can easily change the fingerprint and face ID on an iPhone and iPad.
Thus, without further ado. Let us begin.
How to change the fingerprint on iPhone or iPad?
Every iPhone that comes with Touch ID support will have a fingerprint scanner on the home button.

This is true for iOS devices that are iPhone 5s and up. It's also available on iPad models that have a home button, but not in the case of the iPad Air 2020, which has a home button. The iPad Air 2020 has a Touch ID sensor found on the side power button.
It is possible to change the fingerprint of an iPhone as well as an iPad by following the same procedure in the following steps:

- Launch the Settings app.
- Scroll down, then you'll see "Touch ID" and "Passcode."
- Enter the passcode.
- Touch the fingerprint you'd like to delete or change.
- Tap "Delete Fingerprint."
- Choose "Add a Fingerprint" and follow the steps on the screen to add a brand new fingerprint.
It's that simple. To make the process of removing a fingerprint easier, you can swipe your fingerprint to erase it. It is possible to delete fingerprints using the Touch ID settings. These also allow users to change the names of their fingerprints, making it easier to recognize the fingerprint they've chosen for unlocking their devices.
Furthermore, Apple lets users add up to five fingerprints. This means they can select any finger that is most comfortable in the left or right hand. However, it should be noted that enrolling new fingerprints may cause fingerprint recognition to take a little longer.
Touch ID settings also let you control the purpose for which the fingerprint scanner will be utilized, which allows users to turn Touch ID on and off for iPhone Unlock, in the iTunes and App Store, Apple Pay, and Password AutoFill.
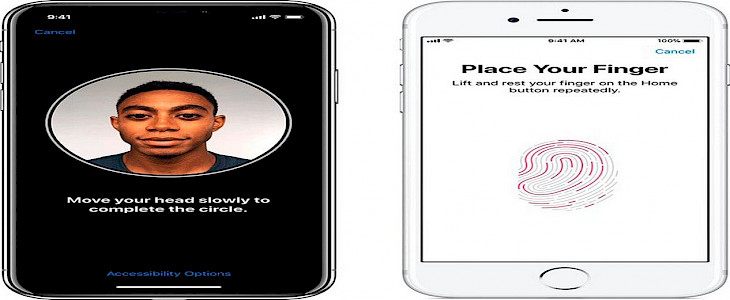
Create a Face ID using the Accessibility Option
The default setting for Face ID requires you to be gentle in moving your head in a circle to display all facial angles. If you're not able to do all the ranges of movement, it's possible to set up Face ID without moving your head.

- Head to Settings > Face ID & Passcode.
- Place your face in the frame, and then click Accessibility Options
Face ID is safe, but it requires more consistency when you view your iPhone.
Change the attention settings.
For added security, Face ID provides additional security. It can be used to protect your iPhone. Face ID is focused. It allows you to unlock your iPhone only when your eyes are closed and you are looking at the screen. The iPhone will also display messages and notifications and keep the screen on when you're reading or writing, or reduce the volume of notifications.

If you don't want your iPhone to monitor your attention, you can do these things:
1. Head to Settings > Face ID & Passcode.
2. You can turn off or on one or all of these:

- Require Attention for Face ID
- Attention-Aware Features
- Haptic On Successful Authentication
3. These settings are off by default when you enable VoiceOver when you first set up your iPhone.
Winding-up
A few things should be kept in mind while changing a Fingerprint/ Face ID.
- Do not use any face mask or cloth while registering the new Face ID.
- Make sure your fingerprint does not have any wear and tear.
- We suggest the use of lesser common fingers like the ring or little finger.
- Do not use the thumb.
And just by these simple steps, anyone can change the Fingerprint/ Face ID on their iPhone/ iPad.


