
Image cropping is a feature that always comes into use. You may need it while editing a picture or simply removing a thing from the picture. But do you need expensive apps like Adobe Photoshop for editing an image?
The answer is no; you can crop your images in Mac by using in-built apps.
Cropping is a fun thing to do, but before you start cropping a picture, make sure that you make a copy of the image.
Here are 2 ways to crop an image on your Mac:-
1. Cropping an Image using the Photos app
To crop an image using a photo app, it must be present in the photo app. In case if you have not created a duplicate copy of the image, you can always find its original copy in the finder.
- Go to the Photos app and select the image you want to crop.
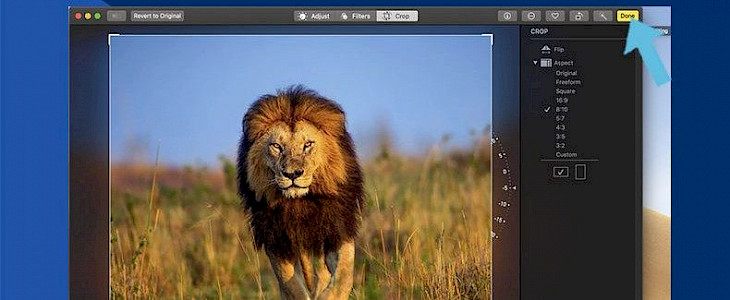
- Click on the edit button present on the top right corner of the window.
- Select the crop option and drag the edges of the crop frame to adjust it properly. The cropped photo will be displayed on the screen, but you can reverse it easily by dragging back the edges of the crop frame.
- Once you have adjusted the cropping frame correctly and obtained the desired results, you can click done.
2. Cropping an Image using Preview app
- Open the preview app on your Mac and navigate to the finder window and select the image.
- Tap on the open button in the corner of the window.
- Select the markup tool and select the area you want to include in the cropped image using a mouse or trackpad pointer.
- Once you have selected the area, a crop button will appear to click on it. Make sure that you are happy with the results in the previous step because after selecting the crop button, it cannot be reversed.
- You are done now.
Conclusion
You can also download and use a third-party app for cropping a picture. Cropping in Mac is very simple. The above-mentioned apps are very helpful in cropping an image.


