
We use our smartphones in various ways. We call people, text each other, stream the internet, click pictures and shoot videos, etc. The expandability of modern smartphones is boundless. It seems just like yesterday when Apple first launched its iPhone to the world and since then smartphones have become better and better.
The camera module of an iPhone is something that helps it stand out from other premium quality products in the market. Since its first smart device, Apple has tried to implement and push the limits of smartphone cameras. Modern-day iPhone cameras can take photos and shoot videos at 4k with a standard recording speed of 8fps. Pair that up with best-in-class Leica lenses and you get one of the best camera modules of 2021. Which can stand toe to toe with any entry-level DSLRs.
Why makes iPhone Camera so special
Firstly, it comes down to built quality. The camera module in iPhones is expertly built using most premium materials. The new iPhone 13 which is scheduled to release at the end of 2021 is rumored to come with Sapphire coated lenses to provide extra durability to an already great camera module.
Secondly, iPhones use best-in-class Sony lenses. It is one of the world leaders in manufacturing lenses for professional cameras and premium quality smartphones.
Thirdly, iPhones do not give you any staggering number of megapixels in your camera module like Android devices. You might easily find some entry-level Android devices providing up to 50-megapixel cameras, but only a fraction of them can be used. Whereas, if an iPhone provides 20 megapixels, the whole 20 megapixels can be used by a user.
Fourthly, the iPhone camera modules are clean. It does not come with any pre-installed bloatware and filters. Whatever you see through an iPhone lens is 100% legit.
Lastly, iPhone camera modules come with numerous editing options so that you can shoot and edit photos and videos with ease.
If you are one of those few people who use your iPhone to shoot a lot of stuff or a beginner who wants to click pro-quality pictures with your iPhone. You have come to the right place. Here, in this article, we will talk about the 5 best iPhone 12 camera tweaks and how you can use them. Let’s begin.
1) Exposure Control
This is an inbuilt feature of the manual mode in your iPhone. In common terms, Exposure is the rate of sunlight you are allowing to enter through the lens to light up your picture. In any standard mobile, the Exposure is digitally controlled by software. But in the iPhone 12, you can manually set the Exposure to take a better-lit picture.
- Launch the Camera app on your iPhone.
- After the camera app opens click on any part of the screen to generate the manual auto-focus. You will see a white circle pop up at the place you clicked accompanied by a chime or a buzz.
- After the auto-focus is set locate the Exposure icon that looks like a sun, click on it.
- Now you can slide up or down and adjust the Exposure at your will.
Note:- If you are clicking pictures in low light be sure to turn the exposure all the way up and don’t forget to turn on the flash.
To learn more about exposure control, click "here"...
2) Face detection
This feature is widely used in the Face ID feature of your iPhone 12. The main motive of face detection is to auto-detect human faces so that the camera can focus on them and blur the background thus, producing more vivid and dynamic portrays of the human form. The camera of the iPhone 12 can detect up to 5 faces and its software can provide a soothing effect within seconds to capture the perfect selfie or group photo every time.
- Open the Camera app on your iPhone.
- Select any mode for photography, use can choose either the front or back camera for this. Both of them will do fine.
- Place your face on the frame and let the software determine your face. It will take hardly a few seconds for the camera to focus on the face and blur the background.
- If you want to change the Exposure or ISO you can do so accordingly. When you think everything is perfect, click the photo.
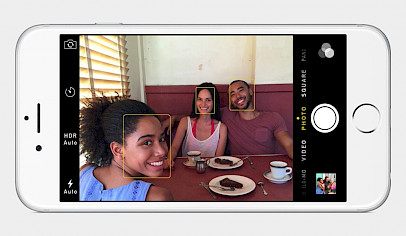
Note:- Do try out the Portrait Mode in your iPhone to enjoy the best face recognition effect.
3) Mastering the Burst Mode
The Burst mode or Sport Mode is used to take continuous pictures of a moving object. In Burst mode the camera shutter opens and closes up to 5 times a second so that you can get the best quality shots of an object in motion.
- Open the camera app on your iPhone.
- Once the app is open tilt your phone to a 180-degree to and hold your finger on the Shutter button.
- Let the software analyze the object you want to shoot, once the auto-focus is set, drag your finger towards the landscape photos and release.

Note:- If you don’t swipe your fingers the camera will go into video mode so be swift with your fingers and remember that you should be as still as a rock to film a perfect Burst shot.
To learn in detail about burst mode and how to master it, click "here"...
4) Shooting in RAW
In photography, raw images are the cleanest and most minimally edited images you can obtain from a camera. A raw photo is like a digital canvas which is easy to edit and the hardest to get right.
To shoot Photos in raw you have to download either of these 2 apps:
1) Moment
2) Firstlight
Once you have installed these apps you can access your camera module via these third-party apps and click any picture. They will be saved in raw format.

Note:- Raw images take much more space than conventional .jpeg images thus, be sure you have a lot of space in your iPhone while going raw.
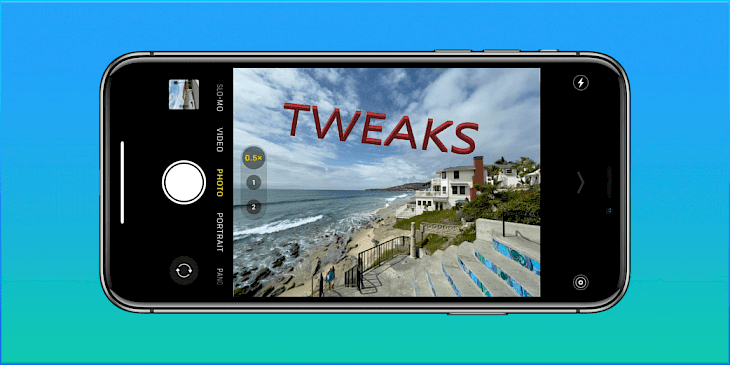
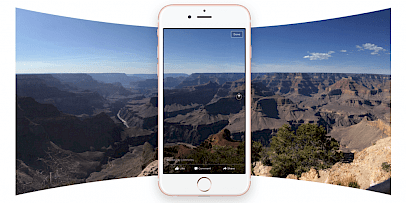
5) Wide Shots and Pano Mode
Suppose you want to click the picture of the whole scenery in one shot. You will need the Wide Shot for it. The iPhone 12 has a very capable built-in wide lens that can easily take photos up to 0.5x.
- Open the Camera app and look towards the shutter button there you will find a circle with 0.5x writer in it, click it.
- The wide-angle lens is in motion. Wait for the software to stabilize the image and when you think the clarity is perfect click the shutter button.
The Pano Mode is another great mode included in your iPhone which lets you capture wide shots for a stretch of 180-degrees.
- Open the Camera app and select “Pano” mode.
- A screen will appear showing an arrow that points to the left, hold on the shutter button, and start moving your phone from left to right without breaking your posture.
- Once the full-frame is captured the software will synthesize the image and show it to you
If you want to learn how to master pano-mode, click "here"...
Note:- Both Wide Angle and Pano modes require complete focus and you cannot break your posture or shake even a tiny bit otherwise you will never get the expected result.
Hope we could provide you with some great insights about your iPhone.
Be sure to come back for more great articles. Good Day


